How to Delete Word Documents
Are you tired of cluttered folders on your computer? Well, you’re in luck!
In this article, we’ll show you how to easily delete those unwanted Word documents. By following these simple steps, you’ll be able to free up valuable space on your hard drive in no time.
So, let’s get started and say goodbye to those unnecessary files once and for all!
Step 1: Locating the Word Documents
To locate the Word documents, you’ll need to open the File Explorer on your computer. This is the tool that allows you to navigate through the files and folders saved on your device.
You can open File Explorer by clicking on the folder icon located on your taskbar or by pressing the Windows key and the letter E at the same time. Once File Explorer is open, you’ll see a list of folders and files.
Look for the folder where your Word documents are saved. It might be called ‘Documents’ or ‘My Documents.’ Click on the folder to open it, and there you will find your Word documents.
Step 2: Selecting Multiple Word Documents
After you’ve chosen the documents you want to remove, simply hold down the Ctrl key and click on each one to select them all at once.
This method allows you to quickly and efficiently select multiple Word documents for deletion. By holding down the Ctrl key, you can easily click on each document without having to individually select them. This is especially useful when you have a large number of documents that need to be deleted.
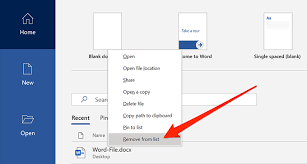
Once you have selected all the documents, you can then proceed to delete them by pressing the Delete key or using the right-click menu and selecting the ‘Delete’ option.
This simple yet effective technique streamlines the process of deleting multiple Word documents, saving you time and effort.
Step 3: Moving Word Documents to the Recycle Bin
Once you’ve selected all the desired files, you can easily move them to the Recycle Bin by dragging and dropping them. This method is simple and efficient, allowing you to quickly delete multiple Word documents at once.
To begin, click on the first document you want to delete and hold down the mouse button. While keeping the button pressed, move the cursor over the Recycle Bin icon on your desktop. Then, release the mouse button to drop the selected files into the bin.
You will see a confirmation message asking if you want to permanently delete the files. To proceed, click ‘Yes.’ The Word documents will be moved to the Recycle Bin, where they will remain until you empty the bin or restore the files if needed.
Step 4: Permanently Deleting Word Documents
When you click ‘Yes’ to confirm, the selected files will be permanently removed from your computer. This step is crucial in ensuring that your Word documents are completely erased and cannot be recovered.
Once you have moved the desired files to the Recycle Bin, it is important to follow through with this final step to ensure they are gone for good. Deleting files permanently eliminates any trace of them from your computer’s storage. It is a necessary measure to take, especially when dealing with sensitive or confidential information.
Keep in mind that once you have clicked ‘Yes’, there is no way to retrieve the files. So, double-check and make sure you have selected the correct files before proceeding with this action.
Step 5: Clearing the Recycle Bin
To completely remove the selected files, make sure you empty the Recycle Bin.
Emptying the Recycle Bin is a crucial step in permanently deleting your Word documents.
When you delete a file, it goes into the Recycle Bin, where it can still be recovered if necessary.
However, if you want to ensure that the files are gone for good, you need to empty the Recycle Bin.
Simply right-click on the Recycle Bin icon on your desktop and select ‘Empty Recycle Bin’ from the menu.
A confirmation message will appear, asking if you are sure you want to permanently delete the files.
Click ‘Yes’ to proceed.
Once the Recycle Bin is emptied, the files will be completely erased from your computer, and you can rest assured that they cannot be recovered.
Conclusion
So now you know how to delete Word documents in just a few simple steps.
By locating the documents, selecting them, and moving them to the Recycle Bin, you can easily clear up space on your computer.
Remember to permanently delete the documents to ensure they are gone for good.
Finally, don’t forget to clear the Recycle Bin to free up even more storage.
With these easy steps, you’ll be able to manage your Word documents efficiently and keep your computer organized.